Table of Contents
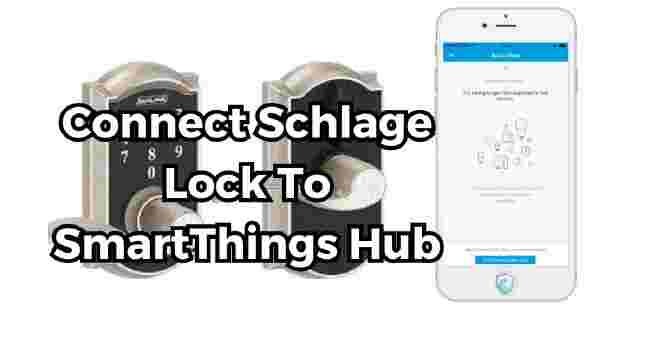
Are you wandering how to connect Schlage lock to SmartThings hub? Yes, as a homeowner to connect a Schlage lock to a SmartThings hub, you can follow some steps.
Few months ago, I remembered been struggled to unlock my front door with an armful of groceries? Sometimes, laid awake at night worrying if I remembered to lock up?
After a long day, I came home one evening to find my back door wide open. My heart raced realizing someone could have easily walked in.
I knew there had to be a better way than fumbling for keys multiple times a day. I discovered the SmartThings hub allowed me to pair my Schlage lock for smartphone access.
Connecting these devices brought me peace of mind knowing my home stays secured. I’ll explain the easy process so you can unlock the same convenience and security.
In this guide, you’ll learn:
- Benefits of connecting your Schlage lock to SmartThings
- What you’ll need to make the connection
- Step-by-step instructions for pairing your devices
- How to customize your lock’s settings
- Troubleshooting tips for common issues
I’ll share plenty of details, tips, and images so you can connect with confidence.
Let’s unlock the convenience of smarter living.
Why Connect Your Schlage Lock to SmartThings?
Before we dig into the how-to, let’s explore why it’s worth connecting your Schlage lock to the SmartThings hub. Integrating these devices unlocks the full potential of your smart home.
- Effortless Access Control
- Increased Peace of Mind
- Smarter Convenience
Effortless Access Control
One of the biggest perks is being able to control access to your home from anywhere. No more hiding keys for guests or wondering if you locked the door.
With the SmartThings app, you can lock and unlock your Schlage lock in an instant using your smartphone.
And if your arms are loaded with groceries, just use your voice instead thanks to compatibility with Amazon Alexa and Google Voice Assistant.
You can even create unique access codes to allow friends, family members, and home services entry when needed, then revoke access just as easily.
Increased Peace of Mind
Wondering whether you remembered to lock up before bed? The SmartThings integration has you covered.
The system can automatically lock your Schlage lock on a schedule you set. For instance, program it to lock each night at 9 pm sharp.
You’ll also receive notifications any time the lock is engaged. So if you’re out for the evening, you’ll know instantly when the kids make it home.
And with the activity log, you can review who accessed the door and when. No more guessing about that random 2 am unlock.
Smarter Convenience
Beyond controlling the lock directly, connecting your Schlage lock to SmartThings allows for powerful automations with other smart devices.
For instance, set your Schlage lock to unlock automatically when you arrive home. The geo-tracking of your phone alerts SmartThings to unlock the deadbolt.
Or program your Schlage lock, lights, and thermostat to activate as soon as you open the door. Imagine walking into a bright, comfortably heated home without lifting a finger.
Those are just a taste of what’s possible when you integrate your Schlage lock with SmartThings. Let’s look at how to make that connection.
What You’ll Need to Connect Schlage Lock to SmartThings
To ensure the pairing process goes smoothly, we need to gather the right gear before we begin. Here’s what you’ll want to have on hand:
Smartphone – iPhone or Android loaded with the latest SmartThings app
Small screwdriver – To access the battery compartment of your Schlage lock
Fresh batteries – For your Schlage lock; avoid low batteries
SmartThings hub – Connected to your Wi-Fi home network
You’ll also want to locate your Schlage lock’s programming code printed on a sticker on the back of the device. This unique code allows the SmartThings hub to interface with the lock.
Okay, now that we’ve covered the basics, let’s get your devices paired.
How To Connect Schlage Lock To SmartThings Hub: Step-by-Step
I’ll walk you through connecting Schlage lock to SmartThings hub step-by-step to ensure success. Along the way, I’ll share some pro troubleshooting tips as well.
- Step 1: Launch the SmartThings App
- Step 2: Initiate Adding a New Device
- Step 3: Select “Schlage Lock”
- Step 4: Enter Your Schlage Programming Code
- Step 5: Put Schlage Lock in Pairing Mode
- Step 6: Let Devices Connect
- Step 7: Test Lock/Unlock Functionality
Step 1: Launch the SmartThings App
Download the SmartThings app on your mobile device if you haven’t already. Open the app once installed.
Ensure you’re logged into your account and connected to the same Wi-Fi network as your hub.
Step 2: Initiate Adding a New Device
Look for and select the “Add Device” button within the app interface. This prompts your hub to begin searching for available devices to control.
Step 3: Select “Schlage Lock”
In the list of discovered devices, choose the option for “Schlage Lock” to indicate you’ll be connecting a Schlage brand lock system.
Step 4: Enter Your Schlage Programming Code
Next, you’ll be asked to input your unique Schlage lock programming code. This allows the SmartThings hub to interface with your lock.
Enter the code carefully from the sticker located on the back of your Schlage lock.
Step 5: Put Schlage Lock in Pairing Mode
The app will now prompt you to put your Schlage lock into pairing mode. Typically this involves:
- Removing the cover from your lock’s interior control panel
- Locating the small programming button
- Pressing and holding the button for 5-10 seconds
Refer to your specific Schlage lock manual if unsure about this process. Usually putting your lock in pairing mode enables SmartThings to discover and connect with the device.
Step 6: Let Devices Connect
Give your phone and Schlage lock about 30-90 seconds to discover each other and pair up. You’ll get a confirmation when the connection is successfully established.
Step 7: Test Lock/Unlock Functionality
To ensure proper setup, use the SmartThings app to remotely lock and unlock your door a few times.
You want reassurance the devices are communicating properly before customizing settings further. Consider additional troubleshooting (more below) if issues arise.
And that’s the basics for how to connect Schlage lock to your SmartThings hub.
Overall a very straightforward process, but let’s go over some common hiccups that can occur next.
Connect Schlage Lock to SmartThings: Troubleshooting Tips
While pairing your Schlage smart lock to the SmartThings hub is usually simple, here are some handy troubleshooting tips for avoiding issues:
Can’t discover/pair devices?
- Double check Wi-Fi connection
- Verify hub electricity and internet connectivity
- Ensure Schlage lock batteries are fresh
- Confirm Schlage lock is in pairing mode
- Delete and re-add devices
Are devices paired but unresponsive?
- Check Schlage lock battery level
- Ensure SmartThings hub is online
- Remove other connected devices that may interfere
- Reset Schlage lock to factory settings
- Delete and re-add Schlage integration
Connection issues or intermittent response?
- Eliminate physical barriers between devices
- Install Wi-Fi range extender if needed
- Toggle Airplane mode on phone to refresh connection
- Rule out wireless interference from other devices
- Update SmartThings app and firmware
Stumped after trying the usual fixes? Many helpful experts are standing by in the SmartThings community support forums. Post a detailed description of your pairing issues for troubleshooting advice.
Customizing Your Schlage Lock in SmartThings
Once your Schlage and SmartThings devices have paired successfully, it’s time to explore customization options. Fine tuning your lock settings to match your lifestyle unlocks even more convenience.
Let’s look at key features available for your Schlage lock in SmartThings:
| Lock Setting | Customization Options |
|---|---|
| Access Control | Add/delete access codes for people √ Grant time-limited guest codes √ Set specific code permissions |
| Notifications | Control types of alerts received √ Customize delivery methods |
| Auto-Lock | Set lock to engage after set time period √ Establish nightly auto-lock schedule |
| Logging | Review entry/exit history √ Export activity reports |
| Z-wave Range | Optimize signal strength √ Add repeaters if needed |
And we’ve barely scratched the surface of possibilities! Also consider setting up multi-device automations like:
Arriving Home Automations
When I unlock my front Schlage lock:
- Front porch lights turn on
- Living room lamps activate
- Nest Thermostat adjusts to 72°F
Leaving Home Automations
When I lock my front Schlage lock:
- All lights turn off
- Nest Thermostat shifts to Away mode
- Robotic vacuum starts cleaning
Customizing your Schlage lock settings maximizes convenience while the SmartThings integration allows you to program powerful automations across devices.
But what if things go awry after setup? Let’s talk potential troubleshooting.
Troubleshooting Your Connected Schlage Lock
While I aim to provide a smooth connection process, hiccups occasionally happen once your Schlage lock joins your smart ecosystem.
Here are some common issues that may arise with solutions:
Problem: Intermittent Connectivity
Why does my lock seem disconnected at times?
Potential Causes:
- Weak batteries
- Outdated lock firmware
- Z-wave interference
- Hub electricity or Wi-Fi disruption
Try These Fixes:
- Replace batteries
- Update Schlage device software
- Relocate or add Z-wave repeaters
- Reboot hub and confirm internet
Problem: Activity Delays
Why do some automations and commands lag?
Potential Causes:
- Z-wave signal obstruction
- App or hub connectivity blips
- Overburdened network traffic
Test These Theories:
- Evaluate environment for barriers
- Check hub linkage and speed
- Assess traffic from other devices
- Add subsequent hubs or repeaters
Problem: Limited Range
Why must I be so close for connectivity?
Potential Causes:
- Weak transmitting antenna
- Too many obstacles or barriers
- Problems with hub placement
- Overburdened wireless signal
Troubleshoot With These Steps:
- Identify antenna issues
- Change lock mounting location
- Relocate hub for clearer path
- Install Z-Wave repeater
- Reduce wireless congestion
Stumped resolving your connectivity issues? Reach out to Schlage or SmartThings support teams. Their technical experts can help diagnose your specific situation.
Let’s Recap: Connecting Your Schlage Lock to SmartThings
In this guide, we covered the ins and outs of integrating your Schlage smart lock with the SmartThings hub.
Here are the key takeaways:
Benefits
Connecting these devices.
- Allows control and automation across your smart home ecosystem
- Provides effortless access management from your phone
- Enables remote locking/unlocking capabilities
- Offers expanded scheduling and notifications
Process
To connect Schlage lock to SmartThings hub…
- Gather necessary hardware ahead of time
- Download SmartThings app
- Initiate adding new device
- Enter Schlage programming code
- Put Schlage lock in pairing mode
- Let SmartThings discover and connect
Customization
After pairing devices.
- Test lock/unlock functionality
- Enable multi-user access codes
- Set schedules, restrictions, alerts
- Explore powerful multi-device automations
Troubleshooting
If connectivity issues pop up.
- Verify hub connection and placement
- Check Schlage lock battery level
- Eliminate physical barriers
- Update firmware/software
- Enlist additional Z-wave repeaters
- Factory reset Schlage device
And those are the basics of connecting your Schlage lock to the SmartThings hub. I hope mapping out the step-by-step process gives you confidence to unlock smarter home functionality.
FAQs
How Do I Add A Lock To Smartthings?
Adding your lock to SmartThings is an easy process. Just open up the SmartThings app on your phone and tap the “Add Device” button.
Choose the option for Schlage locks. You’ll then be prompted to enter your unique Schlage lock code found on the back or in the manual.
Next, you simply put your Schlage lock into pairing mode by holding down the programming button for a few seconds until the lock blinks or beeps. The app will automatically find and add your lock.
If for some reason it doesn’t connect right away, try rebooting your SmartThings hub and ensure your lock has fresh batteries.
You may also need to relocate the hub closer to the lock. The app makes adding Schlage or other branded locks to SmartThings really simple overall.
What Hub Works With Schlage Connect?
The Schlage Connect lock is designed to be compatible with the Samsung SmartThings hub as well as a couple other popular hubs like Wink and Iris by Lowes.
As long as you have a SmartThings or Wink hub that supports the Z-Wave smart home protocol, connecting your Schlage Connect lock is a breeze.
Most people use SmartThings since it has a robust app and integrates well with other devices.
Keep in mind the Schlage Connect is the model that supports hubs. Other Schlage locks like the Keypad Deadbolt need to be combined with the Schlage Sense bridge to work with hubs.
But the Connect links directly so is the easiest model to pair.
How Do I Put My Schlage Lock In Pairing Mode?
Enabling pairing mode on your Schlage lock allows it to interface with your SmartThings hub during setup. Here are the simple steps:
- Remove the cover of your lock interior panel
- Locate the small “program” button
- Press and HOLD this button for 5-7 seconds
- The lock will blink or beep when ready for pairing
On some models, you press and release rather than hold. Just refer to your specific Schlage lock manual for complete instructions.
They usually include step-by-step details and images on properly initiating pairing mode.
Keeping that button held down during hub linking is key for a smooth pairing process.
Does Schlage Encode Work With Smartthings?
Absolutely! The Schlage Encode is one of two smart lock models by Schlage that are designed specifically to integrate with smart home systems like SmartThings, no bridge adapter required.
To be clear, there are two main product lines:
Schlage Connect – Directly supports hubs like SmartThings Schlage Sense – Requires adding the Schlage Sense Wi-Fi Bridge first
So if you want the most seamless experience adding your Schlage lock to SmartThings and controlling it from the app, go with the Connect or Encode models.
How Do I Add A Device To Smartthings Hub?
It only takes a few quick steps to add any device to your SmartThings hub:
- Open the SmartThings app on your phone
- Tap the “+” icon and select “Add Device” from menu
- Choose the device type you want to connect
- Follow app instructions to put the device in pairing mode
- Give the hub 30-90 seconds to discover and pair.
You can repeat those same basic steps to integrate cameras, lights, locks, sensors and more.
As long as your new device is compatible with the Z-Wave or Zigbee protocols SmartThings supports, the process is essentially identical.
Adding devices to SmartThings is designed to be simple for all users.
Do I Need A Smart Hub For Schlage Connect?
Yes – to integrate your Schlage Connect lock with smartphone control, remote access, automations and more, you do need an additional compatible smart hub like SmartThings.
The Schlage Connect is a Z-Wave enabled lock. It can’t link directly to your home Wi-Fi network or apps on its own.
Instead, it must communicate through a central smart hub using the Z-Wave protocol.
That SmartThings hub then provides Wi-Fi connectivity and app integration to give you control over your Schlage Connect lock from anywhere. So the hub is required to unlock the full smart features.
Is There An App For Schlage Connect?
There is not a dedicated official app from Schlage for the Connect model.
Since it was designed specifically to link with smart home platforms, the expectation is you control features like auto-lock, notifications, access codes and more through a hub app – usually the SmartThings app.
However, some users have recommended third-party apps like Schlage Utility that allow basic programming of Connect lock settings like adjusting volume and status indicators for example.
But features related to remote access, automation, multi-user control etc require a hub integration.
How Do I Find My Schlage Connect Default?
If for some reason your Schlage Connect gets reset or you need to revert settings to their factory state, the default value is common across Schlage Connect locks.
To restore all your Schlage Connect lock settings to factory default:
- Tap “Schlage” logo (key bow) 4 times quickly
- Tap “Schlage” logo 1 additional time
- Lock announces reset prompt 3 times
Now your lock programming, user codes, notification settings, etc will all go back to the out-of-the-box state. Re-pair with your hub and adjust settings accordingly.
Conclusion
Now that you have learned how to integrate your Schlage smart lock with the SmartThings hub, I hope you’re feeling empowered to unlock smarter, more convenient living.
Always remember that key benefits like controlling access from anywhere, custom notifications, flexible scheduling, and integration with other smart devices for powerful automations.
However, Home automation empowers incredible control over your living environment when devices communicate properly.
Make the Schlage and SmartThings connection today for next-level convenience while enhancing your household’s comfort and security.


